简介
spring-boot-starter-data-jpa dependency in your project, and you are good to go.Spring Boot Starter 是 Spring Boot 中的一个重要概念,它是一种提供依赖项的方式,可以帮助开发人员快速集成第三方库和框架。Spring Boot Starter 的目的是简化 Spring 应用程序的依赖管理,将一组相关的依赖项打包在一起,并提供一个依赖项描述文件,使开发人员可以快速集成。
Spring Boot Starter 的核心原理是基于 Spring Boot 的自动配置机制,它是 Spring Boot 的一个重要特性,也是实现 Spring Boot Starter 的关键。Spring Boot 的自动配置机制通过扫描 classpath 上的 Jar 包和配置文件,自动创建 Spring Bean,完成对应的配置。开发人员只需引入对应的 Starter 依赖,就能够自动配置所需的 Bean,不需要手动编写配置文件。
查看 Spring 提供的 Starters:spring-boot-starters
结构
一个 Starter 工程通常包含两个模块(不是必须的):
autoconfigure。定义自动配置类以及用于自定义配置的属性类等。starter。用于引入库和自动配置项目的依赖项。
以 Mybatis 为例
其包含如下模块:
mybatis-spring-boot-autoconfiguremybatis-spring-boot-startermybatis-spring-boot-samplesmybatis-spring-boot-starter-testmybatis-spring-boot-test-autoconfigure
命名
实现自己的 Starter,第一步就是为其命名。看一下官方提供的介绍:
What is in a name
All official starters follow a similar naming pattern; spring-boot-starter-*, where * is a particular type of application. This naming structure is intended to help when you need to find a starter. The Maven integration in many IDEs lets you search dependencies by name. For example, with the appropriate Eclipse or Spring Tools plugin installed, you can press ctrl-space in the POM editor and type “spring-boot-starter” for a complete list.
As explained in the “Creating Your Own Starter” section, third party starters should not start with spring-boot, as it is reserved for official Spring Boot artifacts. Rather, a third-party starter typically starts with the name of the project. For example, a third-party starter project called thirdpartyproject would typically be named thirdpartyproject-spring-boot-starter.
建议格式:
- 官方的 Starter 命名格式为:
spring-boot-starter-* - 第三方,即我们自建的 Starter 命名格式为
*-spring-boot-starter
自定义 Starter
我们以基本结构为例(即包含 autoconfigure 和 starter 两个模块),创建我们的自定义 Starter:
创建一个空项目
新建项目 example-spring-boot:

pom.xml
pom.xml 内容参考如下:(建议先将两个模块创建完后再修改)
| |
创建 autoconfigure 模块
右键项目,选择 New -> Module...,创建 example-spring-boot-autoconfigure 模块:

pom.xml
pom.xml 内容参考如下:(建议先将两个模块创建完后再修改)
| |
创建 starter 模块
右键项目,选择 New -> Module...,创建 example-spring-boot-starter 模块:
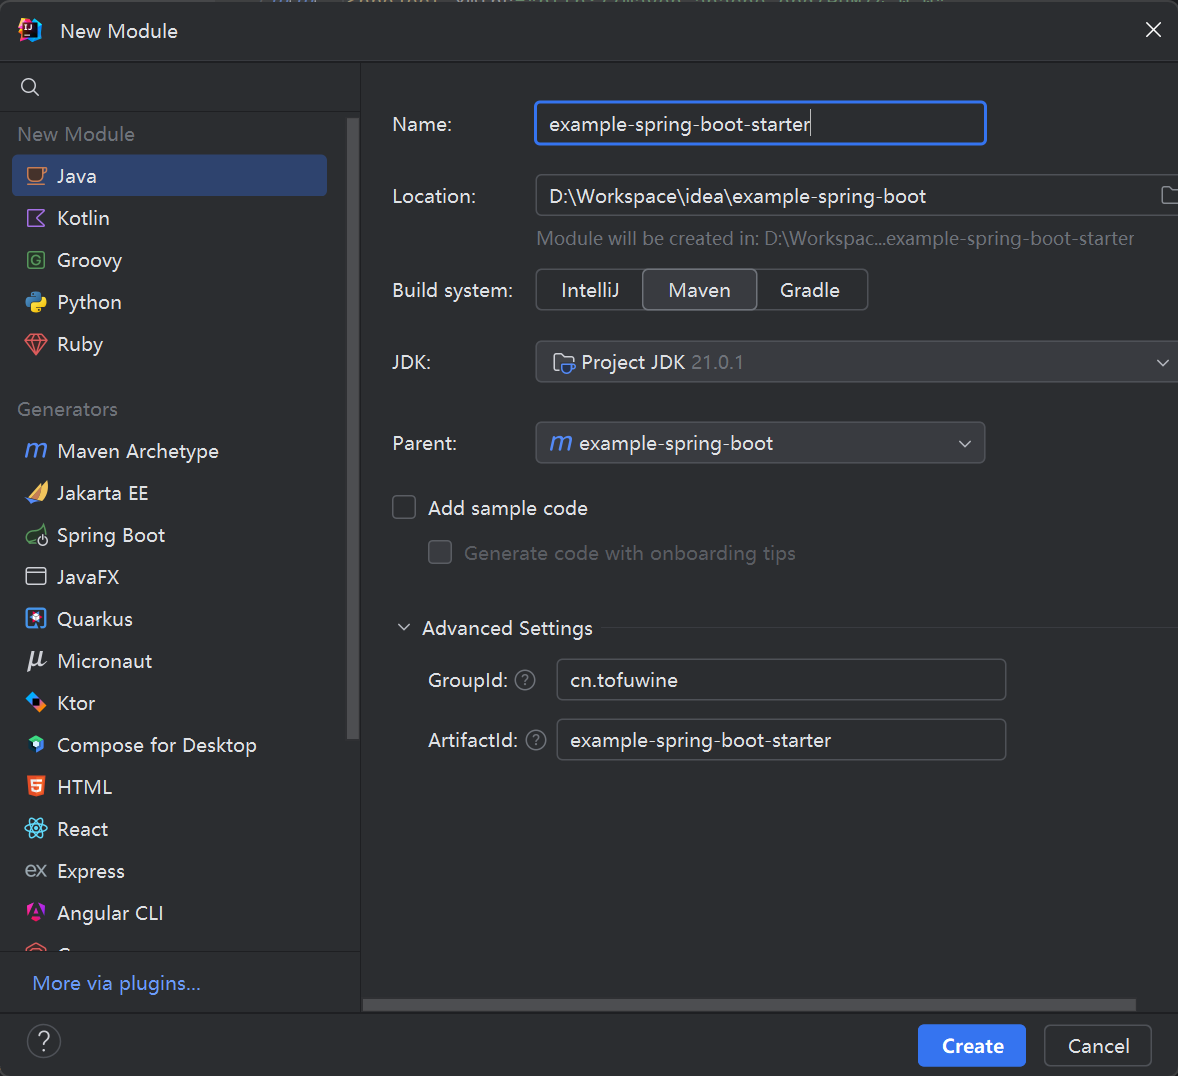
pom.xml
pom.xml 内容参考如下:
| |
The
startermodule that provides a dependency to theautoconfiguremodule as well as “acme” and any additional dependencies that are typically useful. In a nutshell, adding the starter should provide everything needed to start using that library.
starter 模块主要为了提供 autoconfigure 模块的依赖,正常情况下,autoconfigure 引用的依赖应该在此声明。由于我们 autoconfigure 模块未引用其他依赖,此处仅引入 autoconfigure 和 spring-boot-starter。
实现一个简单的功能
在 autoconfigure 模块实现获取当前时间的功能(时间格式根据配置而变):
Properties
作为 Starter 项目,很多情况下需要用户进行必要的配置更改,用户一般在配置文件 (application.properties 或 application.yml)中更改这些配置。我们一般使用 @ConfigurationProperties 进行获取(也可通过 @Vaule + SpEL 表达式获取)。
创建 ExampleProperties,使用 @ConfigurationProperties("example") 注入配置文件 example 节点配置。
| |
元数据 [可选]
元数据文件 spring-configuration-metadata.json,提供所有支持的配置属性的详细信息。这些文件旨在允许 IDE 开发人员在用户使用配置文件 application.properties 或 application.yml 文件时提供上下文帮助和自动补全。

手动创建
在 resources 目录下创建 META-INF 目录,创建 spring-configuration-metadata.json 文件,内容如下:
| |
自动创建
本文示例采用此方式。
通过 spring-boot-configuration-processor 搭配 @ConfigurationProperties 自动创建元数据文件。仅需引入依赖:
| |
Service
新建 TimeService,实现功能:
| |
Configuration
新建配置类,将 Starter 的 Bean 注入到 IoC 中。
使用 @Bean 添加指定的对象到 IoC 中:
| |
也可以使用 @ComponentScan 将所有 cn.tofuwine.example 为前缀的包 Component 均加入到 IoC 中:
| |
至此,我们的功能已经实现。
自动配置
为了让我们的 Starter 在被其他 Spring Boot 项目引用时可直接使用,我们需要指定我们的配置类,并让其自动加载到 ApplicationContext 中。方式如下:
创建文件 META-INF/spring/org.springframework.boot.autoconfigure.AutoConfiguration.imports,并指定 ExampleConfiguration:(如需导入多个,每个占一行)
| |
此方式在 Spring Boot 2.7 起开始支持。其他方式请参考附录。
打包
项目打包并注册到本地仓库(以 IDEA 为例)。
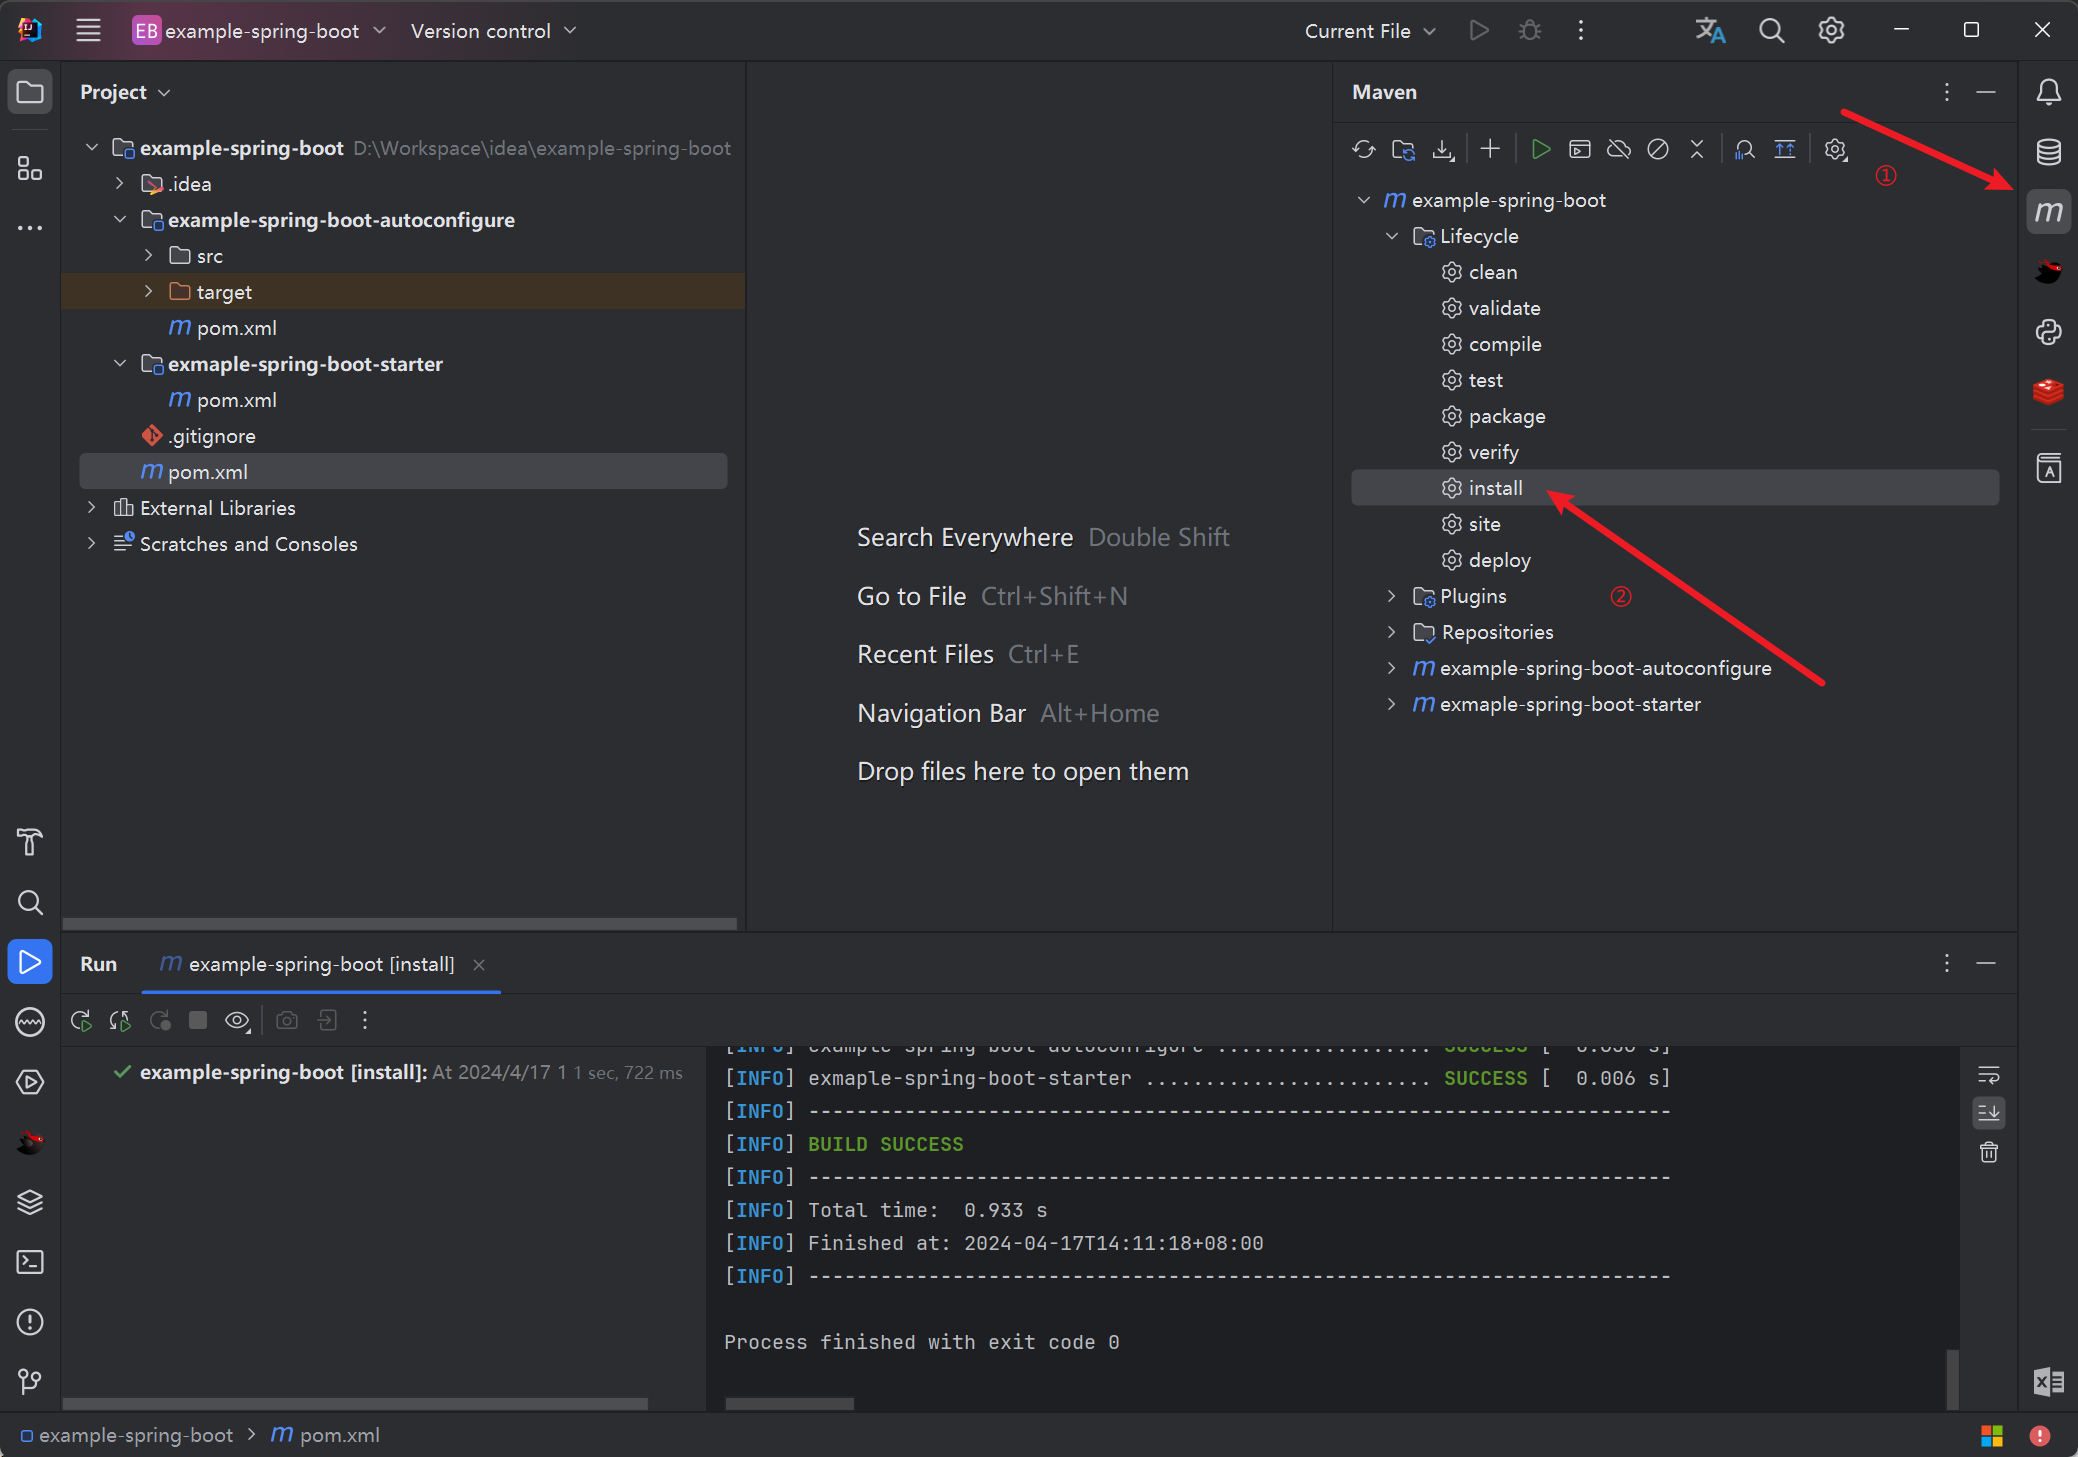
打包后,在 example-spring-boot-autoconfigure 模块 target 目录下生成文件 example-spring-boot-starter-1.0-SNAPSHOT.jar ,同时可以看到在 target/classes/META-INF 目录下包含 spring-configuration-metadata.json 文件。
使用 Starter
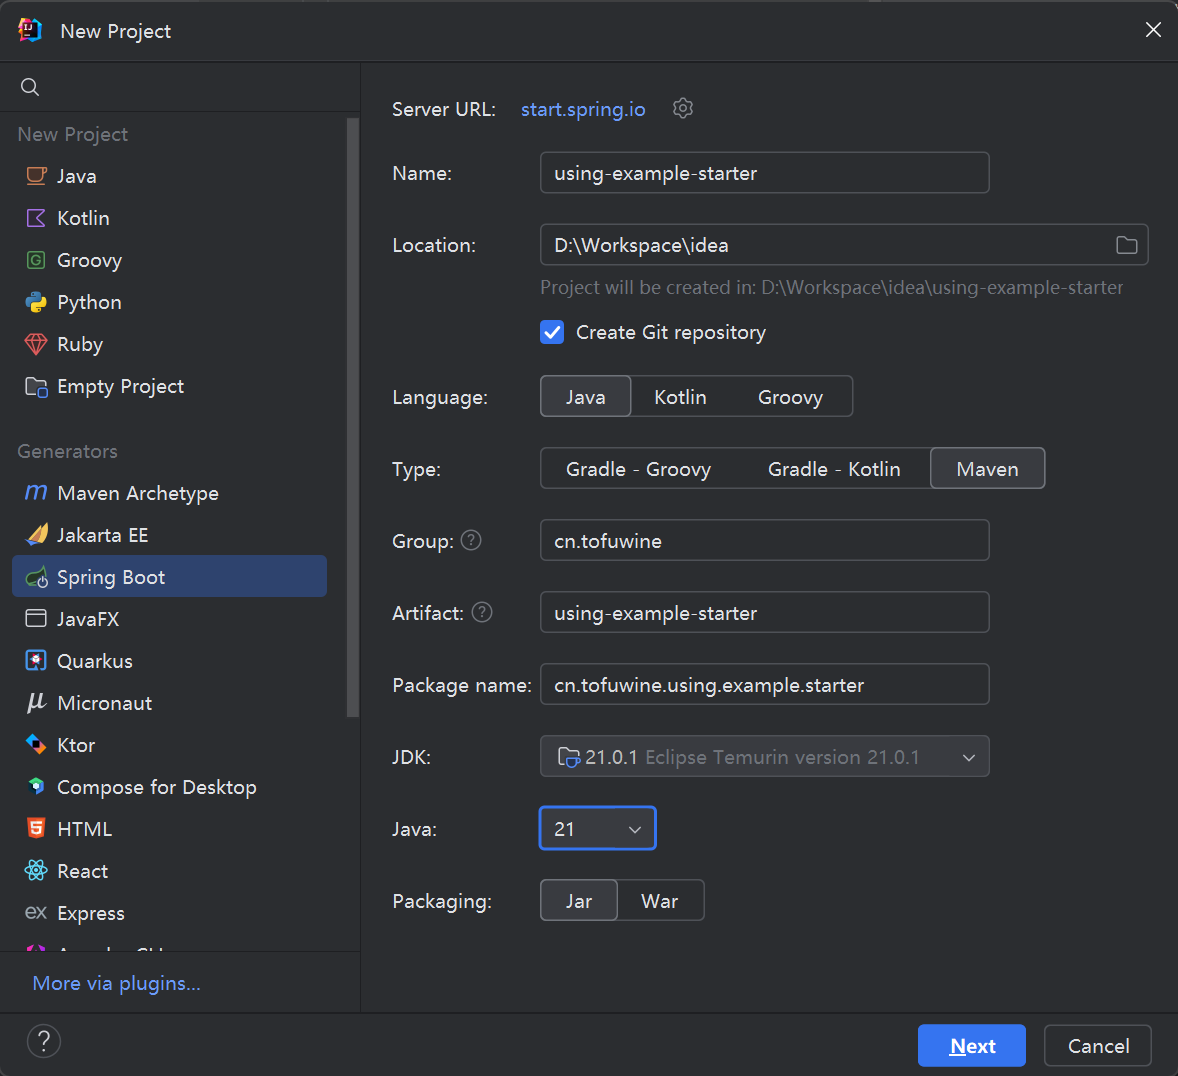
新建 Spring Boot 项目
我们新建一个 Spring Boot 项目 using-example-starter (建议使用与 Starter 同版本 Java 和 Spring Boot):
引入 Starter 依赖
编辑 pom.xml,添加 Starter 依赖:
| |
模拟使用
新建类 ExampleRunner,参考如下:
| |
修改配置文件,添加如下配置(将输出的格式修改为 yyyy-MM-dd):
| |
运行程序,观察控制台输出:

可以看到输出结果是 2024-04-17,符合预期。
单元测试
由于单独的 Starter 并不是一个完整的应用,大多数情况只是作为一个应用的一部分,如果只是通过另一个项目引用并启动,对 debug 有很大的影响,所以我们需要创建可以独立运行的 Test。
依赖
Starter 单元测试引入以下两个依赖(本文上述示例中已经引入):
| |
首先在 test/resources 目录下创建配置文件 application-test.properties,内容如下:
| |
然后,为 TestService 写一个简单的测试:
| |
然后运行查看测试结果,显示 Tests passed: 1。
附录
如何将自定义 Starter 中的组件集成到 Spring Boot 应用中
方式一
在 META-INF 创建文件显示指定配置类。
Spring Boot 2.7 以上版本:
创建文件 META-INF/spring/org.springframework.boot.autoconfigure.AutoConfiguration.imports,并指定相关的类(如需导入多个,每个占一行)。参考文中示例。
Spring Boot 3.0 以下版本
(注意:此方式在 Spring Boot 2.7 开始被标记为 deprecated,并在 Spring Boot 3 开始移除)
创建 META-INF/spring.factories 文件,并指定相关的类(如需导入多个,每个占一行,换行使用 \)。
使用此方式时,当一个 Spring Boot 项目引入我们的 Starter,那么会自动将 Starter 的相关组件注入到其 ApplicationContext 中。
以本文 Starter 为例,spring.factories 内容参考如下:
| |
方式二
创建自定义注解 @EnableXxx,以本文示例,新建注解 @EnableExample,内容如下:
| |
当一个 Spring Boot 项目引入我们的 Starter 后,可以通过使用 @EnableExample 注解开启我们的 Starter,将相关组件注入到其 ApplicationContext 中。相较于方式一,将选择权交给了引用方。


感谢您的耐心阅读!来选个表情,或者留个评论吧!