Java 17 Spring Boot 3.5.5 Springdoc OpenAPI 2.8.13

Maven 依赖

要在 Spring Boot 3 项目中集成 Swagger UI,首先需要添加以下 Maven 依赖:

xml
1
2
3
4
5
<dependency>
    <groupId>org.springdoc</groupId>
    <artifactId>springdoc-openapi-starter-webmvc-ui</artifactId>
    <version>2.8.13</version>
</dependency>

注意:请确保选择与您的 Spring Boot 版本兼容的 Springdoc OpenAPI 版本,详细的版本兼容信息可参考本文末尾的 FAQ 部分。

基础配置

OpenAPI 文档配置

Springdoc OpenAPI 提供了丰富的配置选项,详细配置可参考 官方文档

默认访问路径

添加依赖后,项目启动时会自动生成 OpenAPI 文档,默认访问路径为:

text
1
http://localhost:8080/v3/api-docs

自定义路径与格式

您可以通过配置 springdoc.api-docs.path 来自定义 OpenAPI 文档的访问路径:

properties
1
2
# 自定义 OpenAPI 文档路径为: http://localhost:8080/api-docs
springdoc.api-docs.path=/api-docs

默认情况下,OpenAPI 文档以 JSON 格式返回。若需要 YAML 格式,只需修改路径后缀即可:

properties
1
2
# 设置为 YAML 格式,访问路径为: http://localhost:8080/api-docs.yaml
springdoc.api-docs.path=/api-docs.yaml

Swagger UI 配置

Swagger UI 是一个交互式的 API 文档界面,方便开发者查看和测试接口。详细配置可参考 官方文档

默认访问路径

默认情况下,Swagger UI 的访问路径为:

text
1
http://localhost:8080/swagger-ui/index.html

自定义访问路径

您可以通过配置 springdoc.swagger-ui.path 来自定义 Swagger UI 的访问路径:

properties
1
2
# 自定义 Swagger UI 路径为: http://localhost:8080/swagger-ui-custom.html
springdoc.swagger-ui.path=/swagger-ui-custom.html

实际使用示例

下面通过一个简单的图书管理接口示例,展示如何在 Spring Boot 项目中使用 Swagger UI。假设我们有一个 BookController 类,用于处理图书相关的 RESTful API 请求:

java
  1
  2
  3
  4
  5
  6
  7
  8
  9
 10
 11
 12
 13
 14
 15
 16
 17
 18
 19
 20
 21
 22
 23
 24
 25
 26
 27
 28
 29
 30
 31
 32
 33
 34
 35
 36
 37
 38
 39
 40
 41
 42
 43
 44
 45
 46
 47
 48
 49
 50
 51
 52
 53
 54
 55
 56
 57
 58
 59
 60
 61
 62
 63
 64
 65
 66
 67
 68
 69
 70
 71
 72
 73
 74
 75
 76
 77
 78
 79
 80
 81
 82
 83
 84
 85
 86
 87
 88
 89
 90
 91
 92
 93
 94
 95
 96
 97
 98
 99
100
101
102
103
104
105
106
107
108
109
110
111
112
113
114
115
116
117
118
119
120
121
122
123
124
125
126
127
package cn.tofuwine.swaggerui.controller; 

import java.util.Collection;

import cn.tofuwine.swaggerui.exception.BookNotFoundException;
import cn.tofuwine.swaggerui.model.Book;
import cn.tofuwine.swaggerui.repository.BookRepository;
import jakarta.validation.Valid;
import jakarta.validation.constraints.NotNull;

import org.springframework.http.HttpStatus;
import org.springframework.web.bind.annotation.DeleteMapping;
import org.springframework.web.bind.annotation.GetMapping;
import org.springframework.web.bind.annotation.PatchMapping;
import org.springframework.web.bind.annotation.PathVariable;
import org.springframework.web.bind.annotation.PostMapping;
import org.springframework.web.bind.annotation.PutMapping;
import org.springframework.web.bind.annotation.RequestBody;
import org.springframework.web.bind.annotation.RequestMapping;
import org.springframework.web.bind.annotation.RequestMethod;
import org.springframework.web.bind.annotation.ResponseStatus;
import org.springframework.web.bind.annotation.RestController;

/**
 * The type Book controller.
 */
@RestController
@RequestMapping("/api/book")
public class BookController {

    /**
     * The Repository.
     */
    private final BookRepository repository;

    /**
     * Instantiates a new Book controller.
     *
     * @param repository the repository
     */
    public BookController(BookRepository repository) {
        this.repository = repository;
    }

    /**
     * Find by id book.
     *
     * @param id the id
     * @return the book
     */
    @GetMapping("/{id}")
    public Book findById(@PathVariable long id) {
        return repository.findById(id)
                .orElseThrow(BookNotFoundException::new);
    }

    /**
     * Find books collection.
     *
     * @return the collection
     */
    @GetMapping("/")
    public Collection<Book> findBooks() {
        return repository.getBooks();
    }

    /**
     * Update book.
     *
     * @param id   the id
     * @param book the book
     * @return the book
     */
    @PutMapping("/{id}")
    @ResponseStatus(HttpStatus.OK)
    public Book updateBook(@PathVariable("id") final String id, @RequestBody final Book book) {
        return book;
    }

    /**
     * Patch book.
     *
     * @param id   the id
     * @param book the book
     * @return the book
     */
    @PatchMapping("/{id}")
    @ResponseStatus(HttpStatus.OK)
    public Book patchBook(@PathVariable("id") final String id, @RequestBody final Book book) {
        return book;
    }

    /**
     * Post book.
     *
     * @param book the book
     * @return the book
     */
    @PostMapping("/")
    @ResponseStatus(HttpStatus.CREATED)
    public Book postBook(@NotNull @Valid @RequestBody final Book book) {
        return book;
    }

    /**
     * Head book.
     *
     * @return the book
     */
    @RequestMapping(method = RequestMethod.HEAD, value = "/")
    @ResponseStatus(HttpStatus.OK)
    public Book headBook() {
        return new Book();
    }

    /**
     * Delete book long.
     *
     * @param id the id
     * @return the long
     */
    @DeleteMapping("/{id}")
    @ResponseStatus(HttpStatus.OK)
    public long deleteBook(@PathVariable final long id) {
        return id;
    }
}

完成 Controller 编写后,启动 Spring Boot 应用,系统会自动为我们生成 OpenAPI 文档和 Swagger UI 界面,无需额外配置。

访问生成的文档

  1. 访问 OpenAPI 文档:打开浏览器,输入 http://localhost:8080/v3/api-docs 可以查看生成的 OpenAPI 文档(JSON 格式)

    openapi-docs

  2. 访问 Swagger UI 界面:输入 http://localhost:8080/swagger-ui/index.html 可以查看交互式的 Swagger UI 界面

    swagger-ui

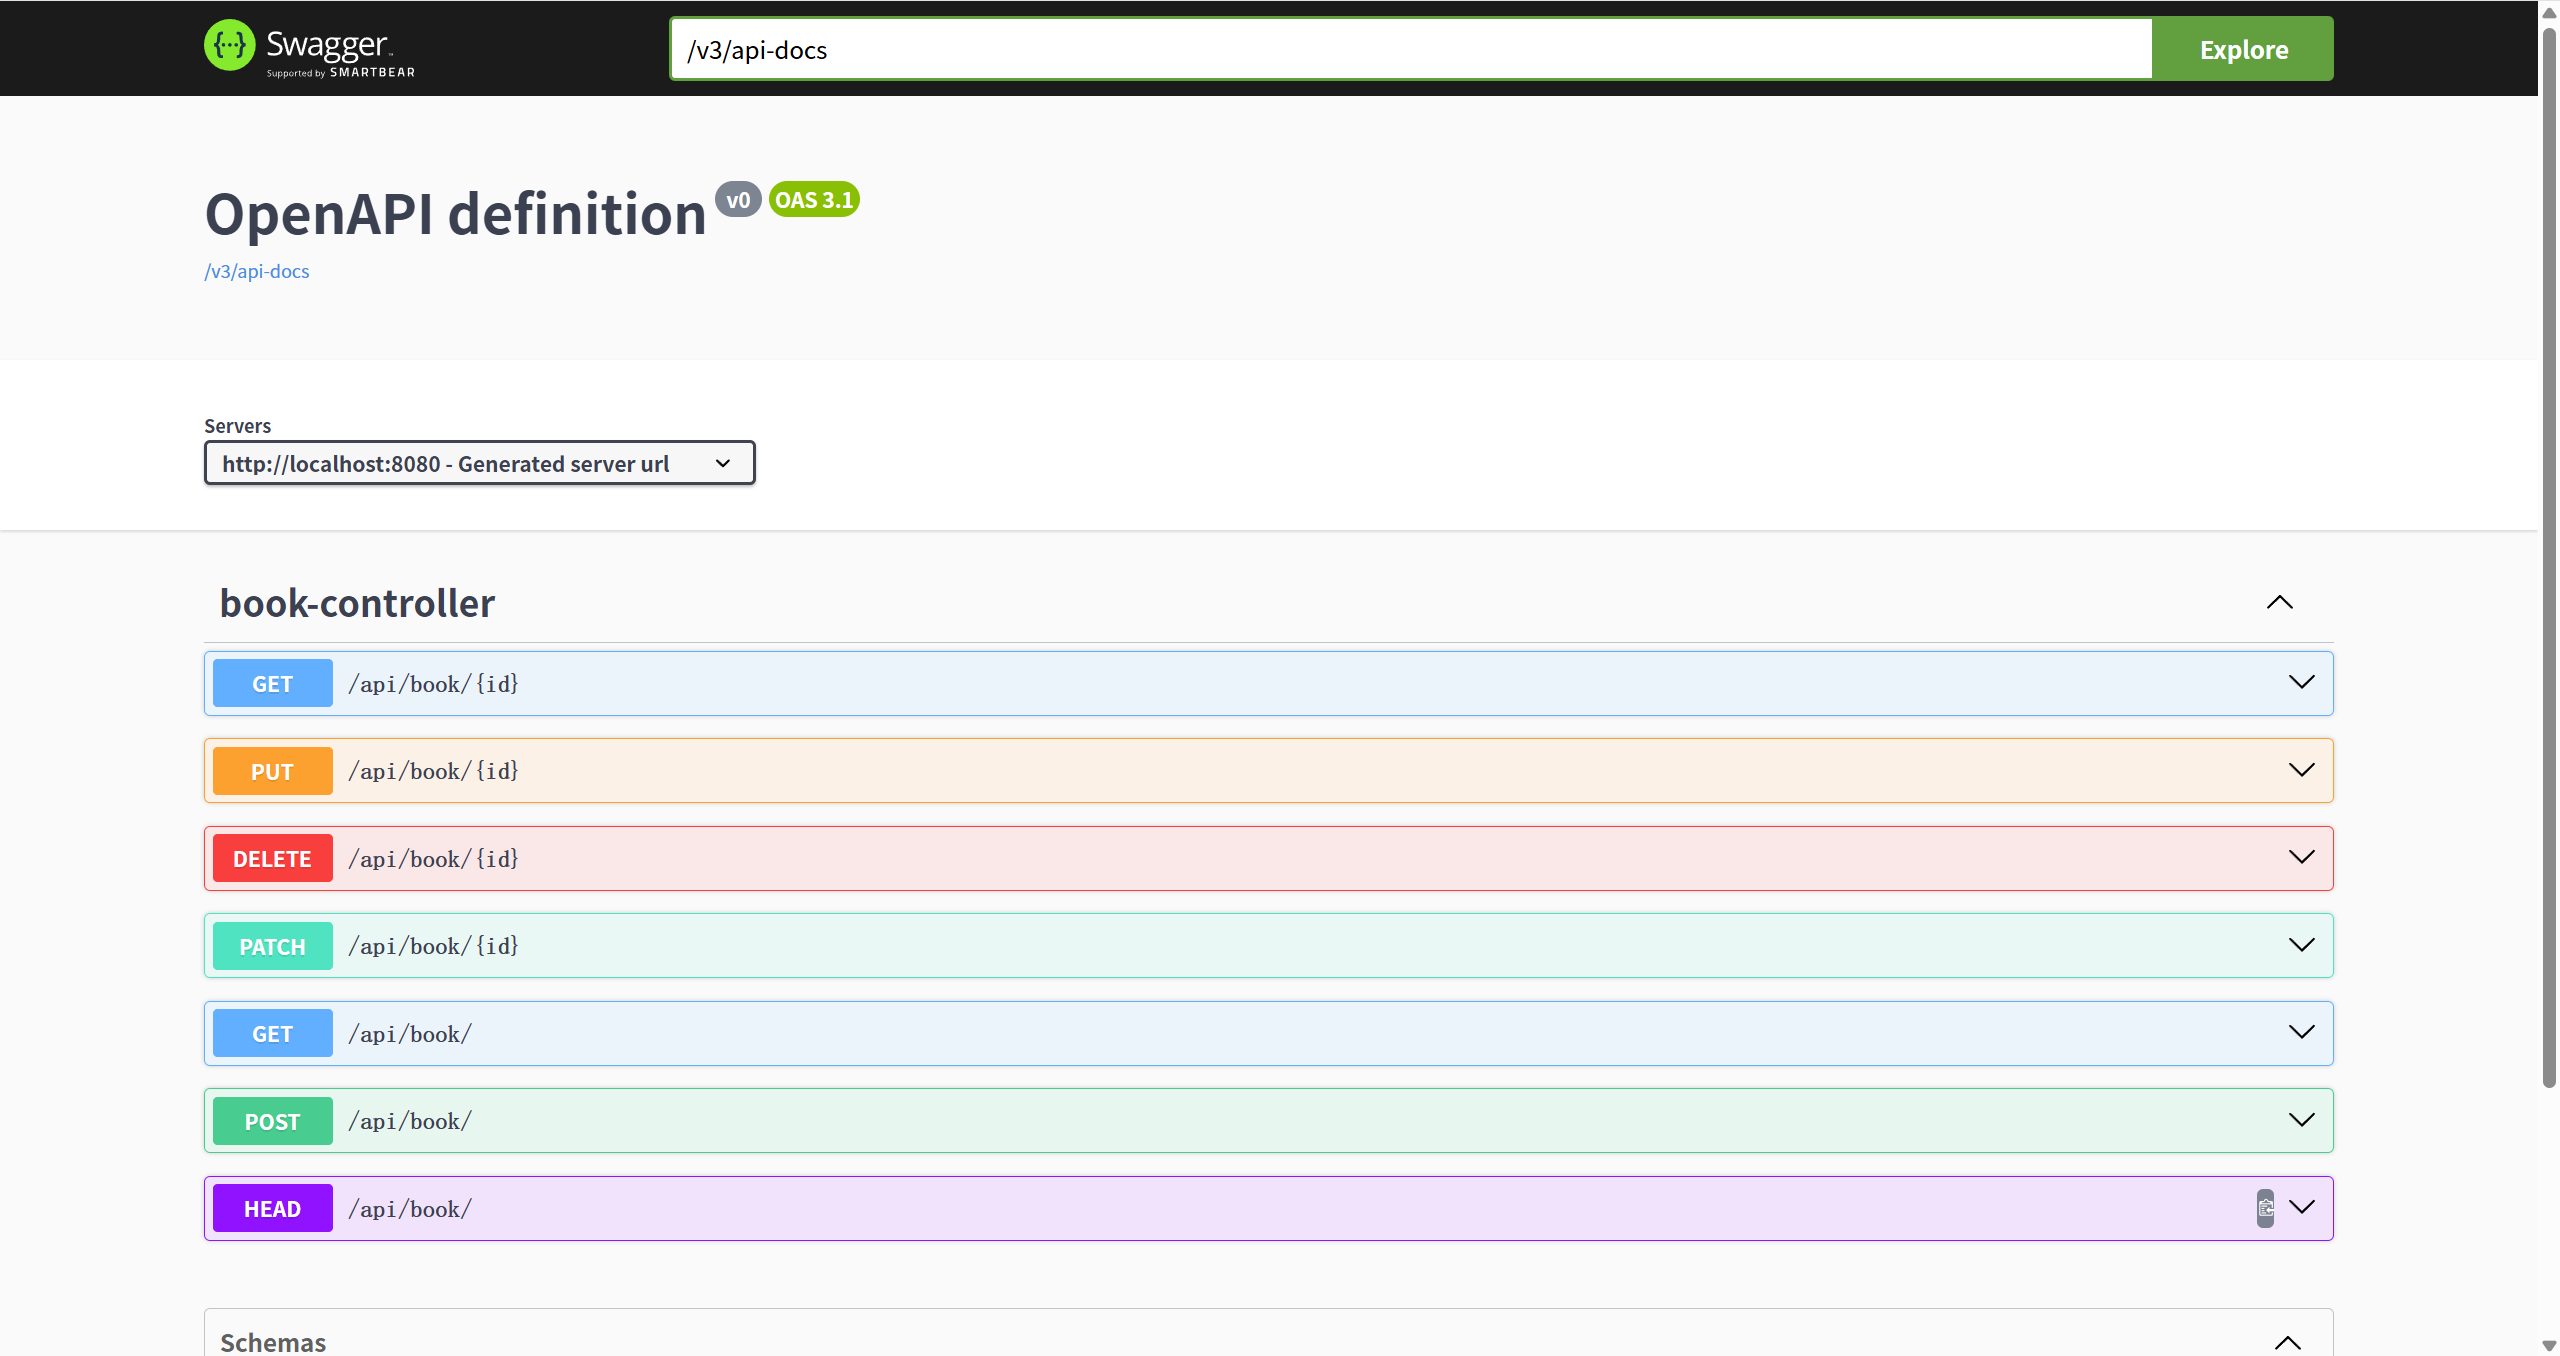
不过,此时生成的文档大多使用默认值或显示为空,缺乏有意义的信息。接下来我们需要对文档进行定制,使其更具实用性。

自定义 OpenAPI 文档信息

我们可以通过创建一个配置类来自定义 OpenAPI 文档的基本信息,如标题、版本、描述等。创建一个名为 OpenAPIConfig 的配置类:

java
 1
 2
 3
 4
 5
 6
 7
 8
 9
10
11
12
13
14
15
16
17
18
19
20
21
22
import io.swagger.v3.oas.models.Components;
import io.swagger.v3.oas.models.OpenAPI;
import io.swagger.v3.oas.models.info.Info;
import io.swagger.v3.oas.models.info.License;
import org.springframework.beans.factory.annotation.Value;
import org.springframework.context.annotation.Bean;
import org.springframework.context.annotation.Configuration;

@Configuration
public class OpenAPIConfig {

    @Bean
    public OpenAPI customOpenAPI(@Value("${app.version}") String version) {
        return new OpenAPI()
                .components(new Components())
                .info(new Info()
                        .title("Book API")
                        .version(version)
                        .description("API documentation for Book endpoints")
                        .license(new License().name("Apache 2.0").url("http://springdoc.org")));
    }
}

配置完成后,重新启动应用,您将看到文档的标题、描述等信息已经更新:

image-20250917165426954

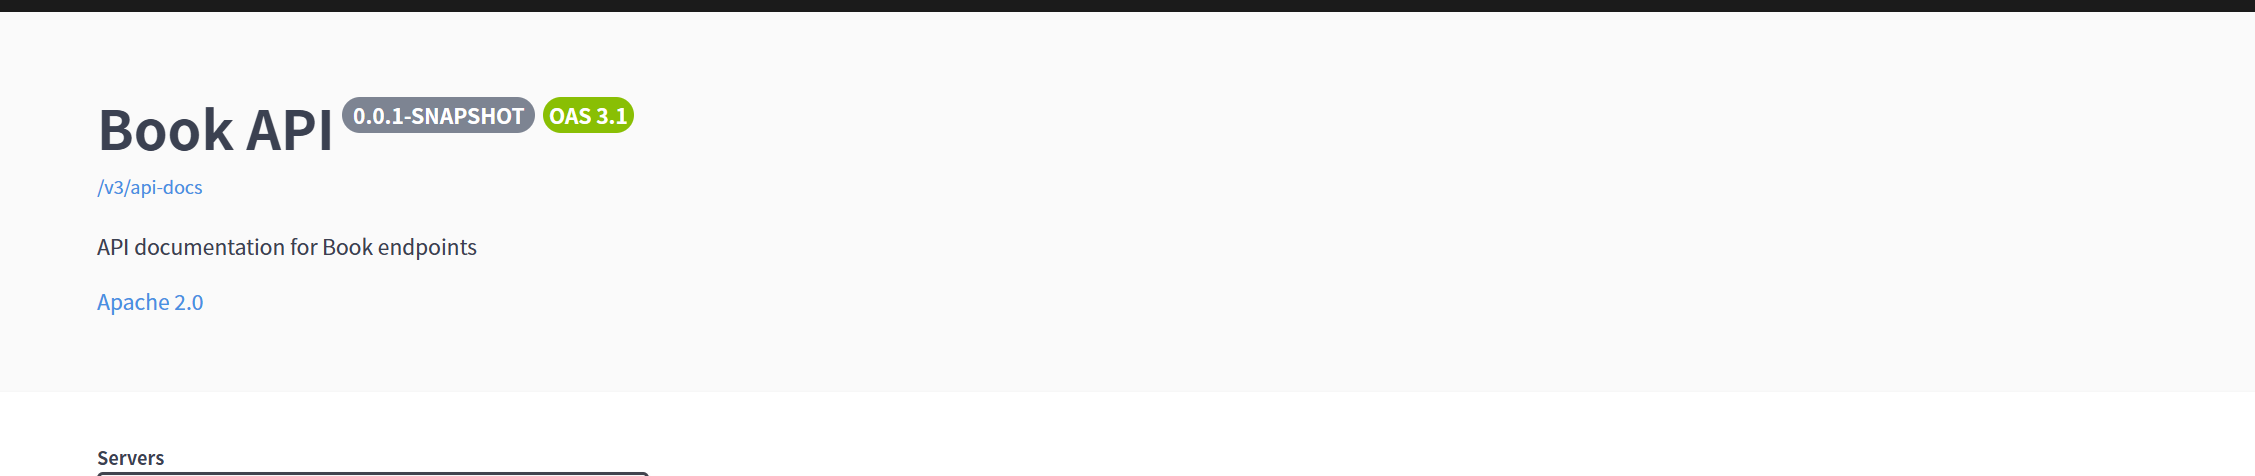
接下来,我们需要为具体的 API 接口添加更详细的描述信息。Springdoc OpenAPI 提供了两种主要方式:传统的注解式写法和更便捷的 Javadoc 写法。

文档增强方法

方法一:使用 Swagger 注解

Springdoc OpenAPI 提供了一系列注解,可以直接添加到 Controller 类、方法和参数上,用于增强 API 文档的详细程度。以下是几个常用的注解:

注解作用
@Tag用于定义 API 分组的标签,每个 API 操作可以有多个标签。
@Operation用于定义 API 操作的详细信息,包括操作的描述、请求方法、参数、响应等。
@ApiResponse用于定义 API 操作的响应的详细信息,包括响应的状态码、响应的描述、响应的示例值等。

下面以 BookControllerfindById 方法为例,展示如何添加 Swagger 注解:

java
 1
 2
 3
 4
 5
 6
 7
 8
 9
10
11
12
13
14
15
16
17
18
19
20
21
22
23
24
25
import io.swagger.v3.oas.annotations.Operation;
import io.swagger.v3.oas.annotations.Parameter;
import io.swagger.v3.oas.annotations.media.Content;
import io.swagger.v3.oas.annotations.media.Schema;
import io.swagger.v3.oas.annotations.responses.ApiResponse;
import io.swagger.v3.oas.annotations.responses.ApiResponses;

import org.springframework.web.bind.annotation.GetMapping;
import org.springframework.web.bind.annotation.PathVariable;

@Operation(summary = "Get a book by its id")
@ApiResponses(value = { 
  @ApiResponse(responseCode = "200", description = "Found the book", 
    content = { @Content(mediaType = "application/json", 
      schema = @Schema(implementation = Book.class)) }),
  @ApiResponse(responseCode = "400", description = "Invalid id supplied", 
    content = @Content), 
  @ApiResponse(responseCode = "404", description = "Book not found", 
    content = @Content) })
@GetMapping("/{id}")
public Book findById(@Parameter(description = "id of book to be searched") 
  @PathVariable long id) {
    return repository.findById(id)
            .orElseThrow(BookNotFoundException::new);
}

方法二:使用 Javadoc 注释(推荐)

注解式写法虽然功能强大,但会导致代码侵入性强,大量注解可能会淹没实际的业务代码。Springdoc OpenAPI 提供了一种更优雅的解决方案 —— 使用标准的 Javadoc 注释来生成 API 文档。

要使用 Javadoc 方式,需要添加以下依赖:

xml
1
2
3
4
5
6
<!-- 运行时库 -->
<dependency>
    <groupId>com.github.therapi</groupId>
    <artifactId>therapi-runtime-javadoc</artifactId>
    <version>0.15.0</version>
</dependency>

同时,还需要在 Maven 编译插件中添加注解处理器:

xml
 1
 2
 3
 4
 5
 6
 7
 8
 9
10
11
12
13
14
15
16
17
18
<!-- 注解处理器配置 -->
<build>
    <plugins>
        <plugin>
            <groupId>org.apache.maven.plugins</groupId>
            <artifactId>maven-compiler-plugin</artifactId>
            <configuration>
                <annotationProcessorPaths>
                    <path>
                        <groupId>com.github.therapi</groupId>
                        <artifactId>therapi-runtime-javadoc-scribe</artifactId>
                        <version>0.15.0</version>
                    </path>
                </annotationProcessorPaths>
            </configuration>
        </plugin>
    </plugins>
</build>

两种文档增强方式对比

维度注解式写法Javadoc 式写法
代码侵入性高:需在类、方法、参数上添加大量注解低:仅需维护标准 Javadoc 注释,无额外代码
业务代码占比低:注解代码可能多于业务逻辑高:注释与业务代码分离,不干扰逻辑阅读
维护成本高:注解需与业务同步修改(如接口名、参数变了,注解也要改)低:修改业务时同步更新注释即可,无需额外改注解
学习成本需学习特定框架的注解规则(如 @Operation@ApiResponse 搭配)基本没有:使用标准 Javadoc 语法即可

总结:推荐使用 Javadoc 方式,因为它能保持代码整洁,降低维护成本,同时不影响文档质量。

常见问题与解决方案

Spring Boot 与 Springdoc OpenAPI 版本兼容矩阵

在集成时,请务必选择与您的 Spring Boot 版本兼容的 Springdoc OpenAPI 版本,以下是官方提供的版本兼容矩阵(更多内容请查看 官方文档):

Spring Boot 版本兼容的 Springdoc OpenAPI 版本
3.5.x2.8.x
3.4.x2.7.x - 2.8.x
3.3.x2.6.x
3.2.x2.3.x - 2.5.x
3.1.x2.2.x
3.0.x2.0.x - 2.1.x
2.7.x、1.5.x1.6.0+
2.6.x、1.5.x1.6.0+
2.5.x、1.5.x1.5.9+
2.4.x、1.5.x1.5.0+
2.3.x、1.5.x1.4.0+
2.2.x、1.5.x1.2.1+
2.0.x、1.5.x1.0.0+

使用 Springdoc-openapi BOM 管理依赖

自 Springdoc OpenAPI 2.8.7 版本开始,官方提供了 BOM(Bill of Materials)支持,可以更方便地管理相关依赖版本:

xml
 1
 2
 3
 4
 5
 6
 7
 8
 9
10
11
<dependencyManagement>
    <dependencies>
        <dependency>
            <groupId>org.springdoc</groupId>
            <artifactId>springdoc-openapi-bom</artifactId>
            <version>2.8.13</version>
            <type>pom</type>
            <scope>import</scope>
        </dependency>
    </dependencies>
</dependencyManagement>

使用 BOM 后,在引入 Springdoc 相关组件时可以无需指定版本号,BOM 会自动管理版本兼容性。

异常处理的文档展示

Springdoc OpenAPI 支持在文档中展示自定义的异常处理逻辑。通过 @ControllerAdvice@ResponseStatus 注解,我们可以为异常情况提供清晰的文档说明:

java
 1
 2
 3
 4
 5
 6
 7
 8
 9
10
11
12
13
14
15
16
17
18
19
20
21
22
23
24
25
26
27
28
29
30
31
32
import org.springframework.core.convert.ConversionFailedException;
import org.springframework.http.HttpStatus;
import org.springframework.http.ProblemDetail;
import org.springframework.web.bind.annotation.ExceptionHandler;
import org.springframework.web.bind.annotation.ResponseStatus;
import org.springframework.web.bind.annotation.RestControllerAdvice;
import org.springframework.web.servlet.mvc.method.annotation.ResponseEntityExceptionHandler;


@RestControllerAdvice
public class GlobalControllerExceptionHandler {

    @ExceptionHandler(ConversionFailedException.class)
    @ResponseStatus(HttpStatus.BAD_REQUEST)
    public ProblemDetail handleConversion(RuntimeException e) {
        ProblemDetail problemDetail = ProblemDetail.forStatusAndDetail(HttpStatus.BAD_REQUEST, e.getMessage());
        problemDetail.setTitle("Bookmark is Not Found");
        problemDetail.setProperty("errorCategory", "Generic Exception");
        problemDetail.setProperty("timestamp", Instant.now());
        return problemDetail;
    }

    @ExceptionHandler(BookNotFoundException.class)
    @ResponseStatus(HttpStatus.NOT_FOUND)
    public ProblemDetail handleBookNotFound(RuntimeException e) {
        ProblemDetail problemDetail = ProblemDetail.forStatusAndDetail(HttpStatus.NOT_FOUND, e.getMessage());
        problemDetail.setTitle("Book Not Found");
        problemDetail.setProperty("errorCategory", "Generic Exception");
        problemDetail.setProperty("timestamp", Instant.now());
        return problemDetail;
    }
}

分页参数的自动文档生成

Springdoc OpenAPI 自 1.6.0 版本起,提供了对 Spring Data JPA 分页参数的原生支持。当您在接口中使用 Pageable 参数时,系统会自动在文档中添加 page、size 和 sort 等查询参数的说明:

示例:

java
1
2
3
4
5
6
import org.springdoc.core.annotations.ParameterObject;

@GetMapping("/filter")
public Page<Book> filterBooks(@ParameterObject Pageable pageable) {
     return repository.getBooks(pageable);
}

参考资源